Thursday, June 9, 2011

How to Hang Corbels & Make a Shelf


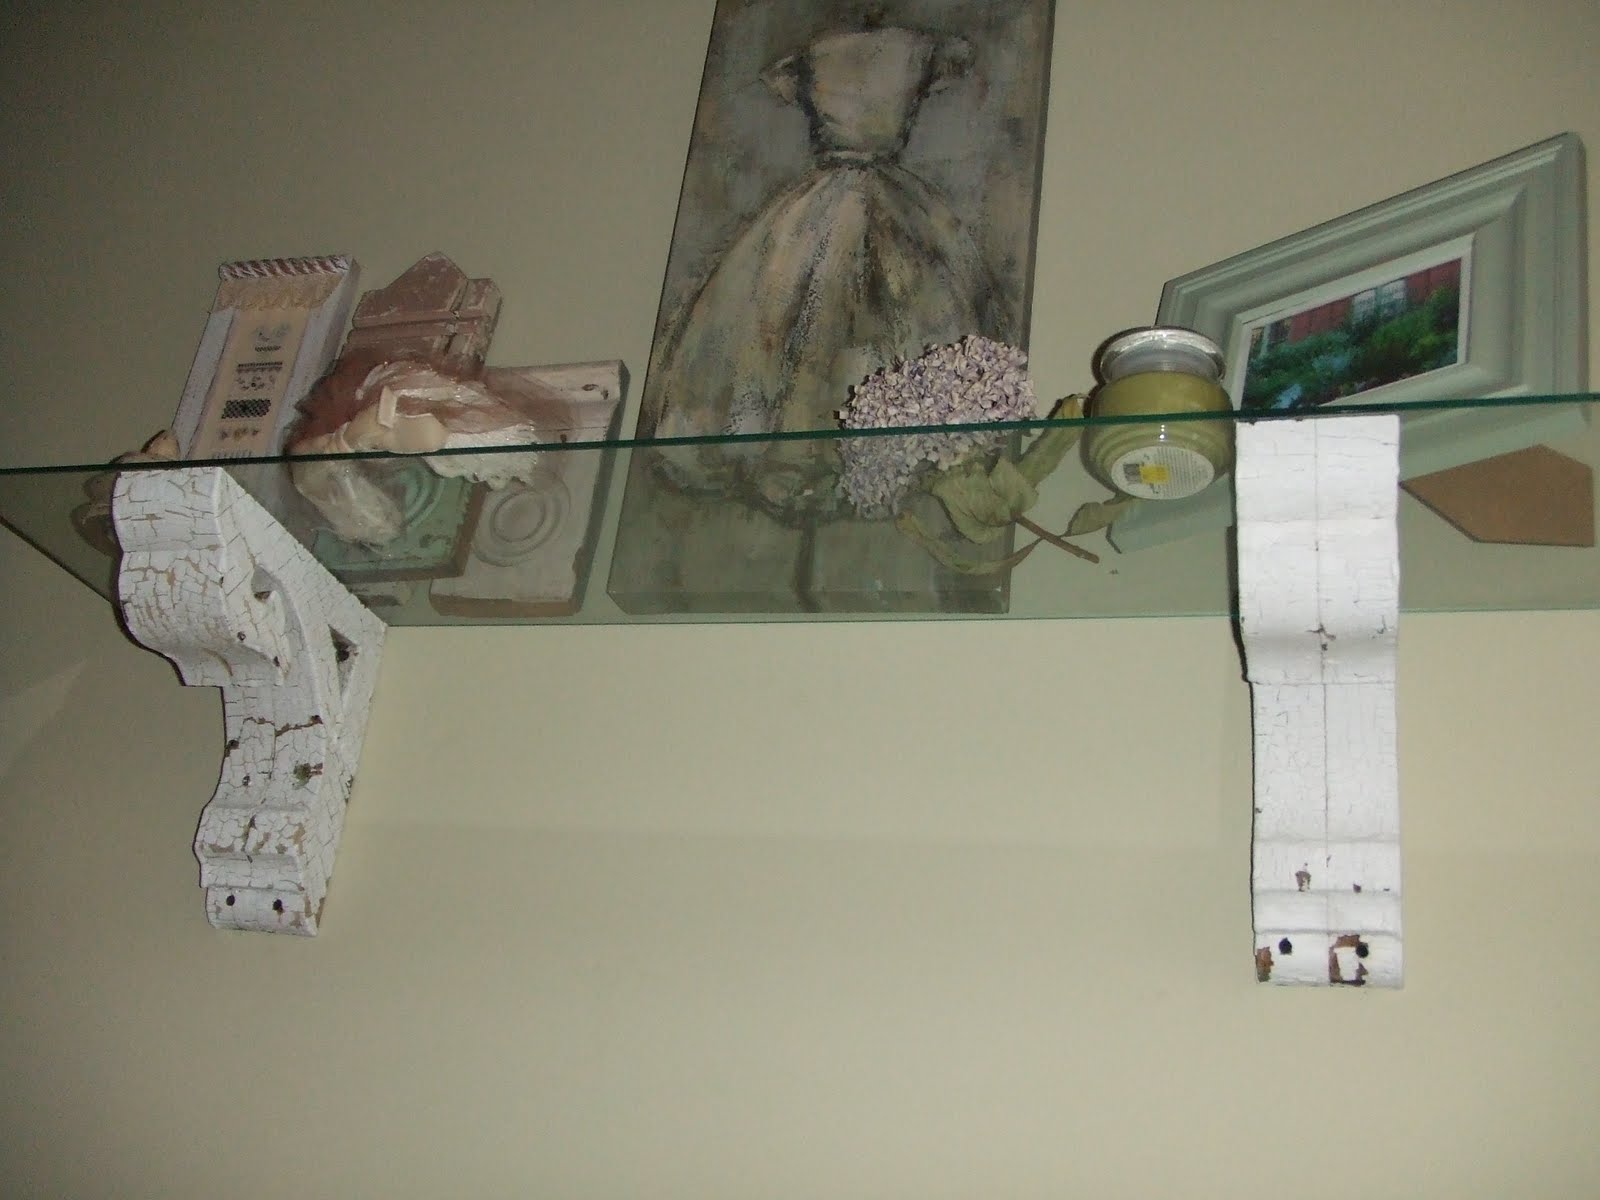
I had these super-duper pair of corbels and I love love love the peeling paint on them. I sanded the tops of the down a bit to make them flat b/c I was thinking....SHELFFFFFFFFFFFFFFFFFFFFFF.

I first had to locate the studs b/c you absolutely have to use those studs!!!! I *toenailed* the nail through the corbels into the studs and made them nice and secure. Using a piece of glass I found curbside (see my note below peeps) I placed it on the corbels to make my shelf. Instant LOVE.

Important* When putting anything glass out for the trash, please be mindful of little kids. In my old neighborhood, someone had placed an old mirror on the ground. Lo and Behold, a little kiddo crashed his bike and he fell right onto the mirror crashing it!!!! INSTANT TERROR. Please dispose of glass and mirrors responsibly

Monday, May 23, 2011

Vintage Corbel Shelf


I bought these two vintage corbels and needed to find a use for them. I had a piece of thick glass I picked up curbside, they worked perfectly together. To hang the corbels to the wall...you'll absolutely need to get a stud finder and locate the studs. If your studs are 14" apart...you will be hanging your corbels at 14". Toe Nail the nails through the pre-drilled corbel hole and put the nail right into the stud. Make it SECURE. The glass piece just sits on top of the flat part of the corbel. Since mine were a bit wonky, I sanded them down. I added two little rubber stoppers (they come with glue) to the wood and put the glass on top of it.

Friday, May 20, 2011

Ye Olde Well Cover!


Just a cute little farm item that made it's way into my landscape. It inspired me to plant around it using plants from other parts of my yard. Because it's wood, I had Mr. Brad build a little platform from wolmanized lumber so it won't be sitting right on the dirt. A little creature found it's way into it as a home...I say WELCOME!

Tuesday, May 17, 2011

The Love of a Cat


I have four cats, all unique personalities. First came Oliver, then Selkie so he would have a buddy. Next came Megee...WOW Crazies Unleashed. She never really bonded with either Oliver or Selkie. She was very hormonal when I brought her home. She had given birth during the winter in an abandoned refrigerator. Two little orange kitties...shivering in the freezing cold in a crisper drawer. A neighbor heard the crying and took pity on them (including boyfriend Marcus). They all ended up in rescue. Was I looking for another cat? Nooooooo, but I saw her on Petfinder and something said *She's the girl you've been wanting*, so I immediately emailed the rescue org. with a long letter. I went to visit her and it was love at first sight for both of us.

Five years go by and along comes Finnegan, a cream point ragdoll....CRAZY isn't quite the word. He is so tenacious that he would NOT give up until he made each of the cats love each other. Because of him, I now have FOUR cats living in harmony and enjoying each other.

Saturday, May 14, 2011


CORNER POSTS. Your Pergola posts will actually be part of your deck railing structure. Just extend them up as high as you want the pergola (or as high as you can purchase them) We used wolmanized, of course.


We're not master woodworkers, just two people trying to save a buck. I hope these photographs will provide you with ideas. I picked up a book on decks, which had clear instructions on how to build the basic pergola. I tweaked it a bit with my own design to make it unique. To make the decorative ends on the grid top...I played with a few designs on paper. When I found something I liked, I drew it onto the wood and cut it with a jigsaw. I then filed the ends with a wood file and hit it with the palm sander. Make sure your boards are as straight as possible...and go big. Get the really sturdy wood b/c this pergola is HEAVY and you want it to stay up nice and straight.

Saturday, May 7, 2011

Mr. Brad and I Build a Pergola!


I've always loved pergola's. Since our deck faces west..you KNOW I NEED some shade! When we were building our deck I thought VIOLA....now is the perfect time to add it to the deck.

I wanted a complex profile and something *personal*. I also wanted something that suited ME...I think we accomplished it! Total cost about $400 plus tons of time, but worth it.

Feed Sack Pillow


A sweet little pillow made from a feed sack. I picked the sack up in a small antique store for about $4.50...I Love, Love, Love the graphic!!! Since I picked up an old pillow with a down insert at a garage sale...I knew they would make the perfect pair.

I hand laundered the towel (the graphics MAY fade in the machine)...and dried him outside. I cut the front 1" larger on all sides than the insert. The back I cut longer by 6". I cut the rectangle in half and turned each piece down about 2.5" since this is an envelope=type opening (no zipper). I turned each piece right side in and seamed around all four sides. Turn right side out and tuck insert inside.

Voila! For about $6 I have a unique downfilled pillow! The moral to this post....don't overlook those tattered pillows...check out the inserts. Since down inserts usually range $20 by themselves...it's a great deal to strip the exterior, wash dry and save them.

Wednesday, May 4, 2011

Library Card Cabinet How I Love Thee!!!


And I can count 90 ways! This beauty has 90 drawers...all complete with the rods. As a little girl I lived across from a library. Mrs. Ruth Boigner was the childrens Librarian. I heart her! I spent most of my time at that library, reading and assisting Mrs. Boigner. She let me *work* at the card catalog. When I had a chance to buy one...I JUMPED at the chance, no second thoughts! It's black walnut and in pristine condition. Just needed a little bit of moisturizing! Isn't she gorgeous!!!!

Two Kisses for Maddy


I was perusing the Target Book Dept...and this cover caught my eye. I picked it up to read the synopsis...and didn't stop. Is it OK to read an entire book @ Target? Ok, Ok I didn't read the ENTIRE book....just a lot of it. It's now on my nightstand. And I cry. Do yourself a favor and buy this book.

ChalkBoard in an old Frame


I picked this absolutely gorgeous wood frame up at a junk store for $10. I immediately thought CHALKBOARD.....I had a can of Krylon Spray Paint in my stash so I went to work. Using my 40% off JoAnn Fabric coupon, I picked up a foam core board and cut it to size. I lightly sanded it with a fine grit paper just to rough up the surface.

I sprayed 3-4 thin coats and let dry.

Sunday, May 1, 2011

Curbside Little Farm Table


This sweet little table called to my on the tree lawn of a neighbor. It formerly lived it's life as a white table with horrendous painted flowers on it...ugh. I knew I needed to rescue it from a landfill. I gave it a thorough wash and sanding. I then painted it sage green and did a bit of distressing. It's a cute little thing isn't it?

Monday, April 25, 2011

Repurposed Baby Shoes


I cut an x into the toe of the baby shoe using an xacto knife. I filled up the shoe and plopped in hens and chicks. I've had them outside for 3 seasons and they're still going strong!

Sunday, April 24, 2011

Happy Easter, Happy Spring


Happy Bloomin' Everything! To *honor* spring, I've decided to treat myself to new curtains made from painters cloths. Not so easy to find six in the same shade, but I worked it out. After washing on warm with soapy water and downy, they came out smelling oh so sweet. I tossed them into the dryer and wrapped myself in their softness.

The cloth will closely resemble linen after dried. Can you beat that for $10 plus change?

I love the idea, but wanted to *amp* mine up. Using fabric I already had, I added a 7.5" band of fabric across the top of the cloth. I didn't sew the bottom on, I liked the idea of *floating*...giving my window panel a little somethin' somethin' extra.

The band is 9.5, using 1" seam on top and bottom.

Thursday, March 24, 2011

A new blog is underway...

I haven't done a *lot* with this blog because I wanted a real life design before I began to post all of my photographs and tutorials. Stick around, they're coming!

I've got a VERY COOL project underway....an entertainment armoire built from vintage doors...it's almost ready!

Tuesday, December 14, 2010

A Very Special Pair of Stockings!


Designed by Shepherd's Bush, Stitched by ME.

Sunday, November 21, 2010

#links

http://funkyjunkinteriors.blogspot.com/

How to letter a chest......


I picked this old chest up on a tree lawn on trash night. It was bare brown wood, but I knew it could be something unique.

I wanted to use the red paint I had on my shelf, the same paint I used in my living room....so I decided to use the Sealtest logo.

First, I had to find the image...so off to eBay I went. I found an old sign for sale and saved the image to my computer. I printed it off and enlarged it on my copier 400%. I then took each letter and again enlarged it to 400%. I kept doing this until I had each of the letters. I trimmed them out with an x-acto knife, then taped them together.

I laid it out on the top of the chest and drew around each letter with a pencil. Using an old brush and cream paint that I had, I painted inside the pencil lines.

Saturday, November 6, 2010

Guest Room on a SMALL Budget


Footboard turned Headboard $5
Cream Dresser (garage sale) $25
Pretty Mirror (garage sale) $5
Pretty Green Chest (garage sale) $25

My gorgeous lamp on dresser....Goodwill $15
Re-wired kit $5
Shade (repurposed)

Green wicker chair (garage sale) $5
Can of Spray Paint $5.00

That gorgeous crocheted throw on chair (Goodwill) $3
Premium mattress & box springs (Sears) a HUGE buy at $450

Red Wall Paint ~ Behr $22
Yellow Wall Paint ~ Left overs, I did glaze 3 walls

Custom duvet on bed from Ethan Allen (store sample $50
Custom pillow shams from Ethan Allen (store sample $25

The Floral Pillows, Dust Ruffle and Europillow from Arhaus Furniture
Custom set (originally $500)...I paid $40

The Floral Drapes, sewn by me, purchased fabric from JoAnn's @ 50% off,
used an old sheet as liner $30

My vintage dresser trays hanging all from Goodwill...approx $1.00-3.00 each

Can anyone add this up? I think I'm up to a GRAND TOTAL of $750 approximately)

Tuesday, June 1, 2010

Thanks...

for taking a stroll through my spring garden. This is just a *wee* peek at what's going on at Carey Cottage. Stop back again for more photos.

Questions? I'm always happy to help!


Computer Issues

sidelined my blogging....so I'm back!